How to Convert PIL Image to NumPy Array: A Comprehensive Guide
Convert PIL image to NumPy array is a common task in image processing and computer vision applications. This article will provide a detailed explanation of the process, along with numerous examples and code snippets to help you understand and implement this conversion effectively.
Introduction to PIL Image and NumPy Array
Before we dive into the conversion process, let’s briefly discuss what PIL Image and NumPy arrays are:
- PIL Image: PIL (Python Imaging Library) is a popular library for opening, manipulating, and saving various image file formats. It provides an efficient internal representation for images.
-
NumPy Array: NumPy is a fundamental package for scientific computing in Python. It provides support for large, multi-dimensional arrays and matrices, along with a collection of mathematical functions to operate on these arrays.
Converting a PIL Image to a NumPy array allows us to leverage the powerful numerical operations and functions provided by NumPy for image processing tasks.
Basic Conversion: PIL Image to NumPy Array
The most straightforward way to convert a PIL Image to a NumPy array is by using the numpy.array() function. Here’s a simple example:
import numpy as np
from PIL import Image

# Open an image file
img = Image.open("numpyarray.jpg")

# Convert PIL Image to NumPy array
img_array = np.array(img)

print(type(img_array))
print(img_array.shape)
Output:
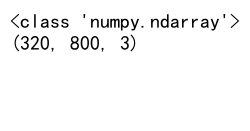
In this example, we first open an image file using PIL’s Image.open() function. Then, we use np.array() to convert the PIL Image object to a NumPy array. The resulting img_array is a NumPy ndarray containing the image data.
Understanding the Resulting NumPy Array
When you convert a PIL Image to a NumPy array, the resulting array’s shape and data type depend on the original image:
- For grayscale images: The array will have shape (height, width) and dtype uint8.
- For RGB images: The array will have shape (height, width, 3) and dtype uint8.
- For RGBA images: The array will have shape (height, width, 4) and dtype uint8.
Let’s look at an example that demonstrates this:
import numpy as np
from PIL import Image

# Open different types of images
grayscale_img = Image.open("numpyarray.com/grayscale_image.jpg").convert("L")
rgb_img = Image.open("numpyarray.com/rgb_image.jpg")
rgba_img = Image.open("numpyarray.com/rgba_image.png")

# Convert to NumPy arrays
grayscale_array = np.array(grayscale_img)
rgb_array = np.array(rgb_img)
rgba_array = np.array(rgba_img)

print(f"Grayscale array shape: {grayscale_array.shape}, dtype: {grayscale_array.dtype}")
print(f"RGB array shape: {rgb_array.shape}, dtype: {rgb_array.dtype}")
print(f"RGBA array shape: {rgba_array.shape}, dtype: {rgba_array.dtype}")
This example demonstrates how different image types result in NumPy arrays with different shapes and the same data type (uint8).
Converting Specific Channels
Sometimes, you may want to convert only specific channels of an image to a NumPy array. Here’s how you can do that:
import numpy as np
from PIL import Image

# Open an RGB image
img = Image.open("numpyarray.jpg")

# Convert specific channels to NumPy arrays
red_channel = np.array(img)[:, :, 0]
green_channel = np.array(img)[:, :, 1]
blue_channel = np.array(img)[:, :, 2]

print(f"Red channel shape: {red_channel.shape}")
print(f"Green channel shape: {green_channel.shape}")
print(f"Blue channel shape: {blue_channel.shape}")
Output:
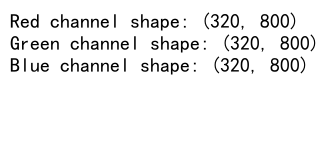
In this example, we extract individual color channels from an RGB image by selecting specific indices from the third dimension of the NumPy array.
Converting PIL Image to NumPy Array with Type Conversion
By default, the NumPy array created from a PIL Image has a dtype of uint8. However, you might need to work with different data types for certain operations. Here’s how you can convert a PIL Image to a NumPy array with a specific data type:
import numpy as np
from PIL import Image

# Open an image
img = Image.open("numpyarray.jpg")

# Convert to NumPy array with float32 dtype
img_array_float = np.array(img, dtype=np.float32)

print(f"Array shape: {img_array_float.shape}, dtype: {img_array_float.dtype}")
Output:

This example demonstrates how to convert a PIL Image to a NumPy array with a float32 data type, which can be useful for certain mathematical operations.
Normalizing the NumPy Array
When working with image data, it’s often beneficial to normalize the pixel values to a range between 0 and 1. Here’s how you can do this during the conversion process:
import numpy as np
from PIL import Image

# Open an image
img = Image.open("numpyarray.jpg")

# Convert to NumPy array and normalize
img_array_normalized = np.array(img, dtype=np.float32) / 255.0

print(f"Array shape: {img_array_normalized.shape}, dtype: {img_array_normalized.dtype}")
print(f"Min value: {img_array_normalized.min()}, Max value: {img_array_normalized.max()}")
Output:

In this example, we convert the PIL Image to a NumPy array with float32 dtype and then divide by 255.0 to normalize the values to the range [0, 1].
Converting PIL Image to NumPy Array with Resizing
Sometimes, you may need to resize the image during the conversion process. Here’s how you can combine resizing with the conversion:
import numpy as np
from PIL import Image

# Open an image
img = Image.open("numpyarray.jpg")

# Resize and convert to NumPy array
new_size = (224, 224)
img_resized = img.resize(new_size)
img_array = np.array(img_resized)

print(f"Array shape: {img_array.shape}")
Output:
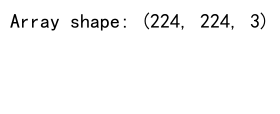
This example demonstrates how to resize a PIL Image before converting it to a NumPy array, which can be useful for preparing images for machine learning models that expect a specific input size.
Handling Alpha Channel in RGBA Images
When converting RGBA images to NumPy arrays, you might want to handle the alpha channel separately or remove it altogether. Here’s an example:
import numpy as np
from PIL import Image

# Open an RGBA image
img = Image.open("numpyarray.jpg")

# Convert to NumPy array
img_array = np.array(img)

# Separate RGB and Alpha channels
rgb_array = img_array[:, :, :3]
alpha_array = img_array[:, :, 3]

print(f"RGB array shape: {rgb_array.shape}")
print(f"Alpha array shape: {alpha_array.shape}")
This example shows how to separate the RGB channels from the alpha channel when converting an RGBA image to a NumPy array.
Converting PIL Image to NumPy Array with Color Mode Conversion
You can also change the color mode of an image during the conversion process. Here’s an example that converts an RGB image to grayscale:
import numpy as np
from PIL import Image

# Open an RGB image
img = Image.open("numpyarray.jpg")

# Convert to grayscale and then to NumPy array
img_gray = img.convert("L")
img_array = np.array(img_gray)

print(f"Array shape: {img_array.shape}")
Output:
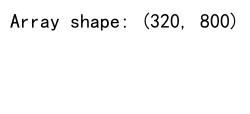
This example demonstrates how to convert an RGB image to grayscale using PIL’s convert() method before converting it to a NumPy array.
Batch Converting Multiple PIL Images to NumPy Arrays
When working with multiple images, you might want to convert them all to NumPy arrays in a batch. Here’s how you can do that:
import numpy as np
from PIL import Image
import os

# Directory containing images
image_dir = "numpyarray.com/images/"

# List all image files
image_files = [f for f in os.listdir(image_dir) if f.endswith(('.png', '.jpg', '.jpeg'))]

# Convert all images to NumPy arrays
image_arrays = []
for file in image_files:
    img = Image.open(os.path.join(image_dir, file))
    img_array = np.array(img)
    image_arrays.append(img_array)

print(f"Number of images converted: {len(image_arrays)}")
print(f"Shape of first image array: {image_arrays[0].shape}")
This example shows how to convert multiple images in a directory to NumPy arrays and store them in a list.
Converting PIL Image to NumPy Array with Padding
In some cases, you might need to add padding to an image during the conversion process. Here’s an example of how to do this:
import numpy as np
from PIL import Image

# Open an image
img = Image.open("numpyarray.jpg")

# Convert to NumPy array
img_array = np.array(img)

# Add padding
pad_width = ((10, 10), (10, 10), (0, 0))
img_padded = np.pad(img_array, pad_width, mode='constant', constant_values=0)

print(f"Original array shape: {img_array.shape}")
print(f"Padded array shape: {img_padded.shape}")
Output:
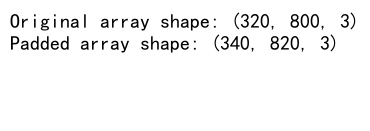
This example demonstrates how to add padding to an image array using NumPy’s pad() function.
Converting PIL Image to NumPy Array with Cropping
You might also want to crop an image during the conversion process. Here’s how you can do that:
import numpy as np
from PIL import Image

# Open an image
img = Image.open("numpyarray.jpg")

# Define crop box (left, upper, right, lower)
crop_box = (100, 100, 300, 300)

# Crop and convert to NumPy array
img_cropped = img.crop(crop_box)
img_array = np.array(img_cropped)

print(f"Cropped array shape: {img_array.shape}")
Output:

This example shows how to crop a PIL Image before converting it to a NumPy array.
Converting PIL Image to NumPy Array with Color Space Conversion
Sometimes, you might need to convert the color space of an image during the conversion process. Here’s an example that converts an RGB image to HSV:
import numpy as np
from PIL import Image
import cv2

# Open an RGB image
img = Image.open("numpyarray.jpg")

# Convert to NumPy array
img_array = np.array(img)

# Convert RGB to HSV
img_hsv = cv2.cvtColor(img_array, cv2.COLOR_RGB2HSV)

print(f"RGB array shape: {img_array.shape}")
print(f"HSV array shape: {img_hsv.shape}")
This example demonstrates how to convert an RGB image to HSV color space using OpenCV’s cvtColor() function after converting the PIL Image to a NumPy array.
Converting PIL Image to NumPy Array with Data Augmentation
Data augmentation is a common technique in machine learning to increase the diversity of training data. Here’s an example of how you can apply a simple augmentation during the conversion process:
import numpy as np
from PIL import Image

# Open an image
img = Image.open("numpyarray.jpg")

# Apply horizontal flip and convert to NumPy array
img_flipped = img.transpose(Image.FLIP_LEFT_RIGHT)
img_array = np.array(img_flipped)

print(f"Flipped array shape: {img_array.shape}")
Output:

This example shows how to apply a horizontal flip to an image using PIL’s transpose() method before converting it to a NumPy array.
Converting PIL Image to NumPy Array with Gamma Correction
Gamma correction can be applied to adjust the brightness and contrast of an image. Here’s how you can apply gamma correction during the conversion process:
import numpy as np
from PIL import Image

# Open an image
img = Image.open("numpyarray.jpg")

# Convert to NumPy array
img_array = np.array(img, dtype=np.float32) / 255.0

# Apply gamma correction
gamma = 2.2
img_gamma_corrected = np.power(img_array, gamma)

# Convert back to uint8
img_gamma_corrected = (img_gamma_corrected * 255).astype(np.uint8)

print(f"Gamma corrected array shape: {img_gamma_corrected.shape}")
Output:

This example demonstrates how to apply gamma correction to an image array after converting a PIL Image to a NumPy array.
Converting PIL images to NumPy arrays Conclusion
Converting PIL images to NumPy arrays is a fundamental operation in image processing and computer vision tasks. This article has covered various aspects of this conversion process, including basic conversion, handling different image types, working with specific channels, type conversion, normalization, resizing, and more.
By understanding these techniques, you can effectively prepare your image data for further processing or analysis using NumPy’s powerful array operations. Remember to choose the appropriate conversion method based on your specific requirements and the nature of your image data.
Whether you’re working on a simple image processing task or a complex computer vision project, mastering the conversion between PIL images and NumPy arrays will greatly enhance your ability to manipulate and analyze image data efficiently.